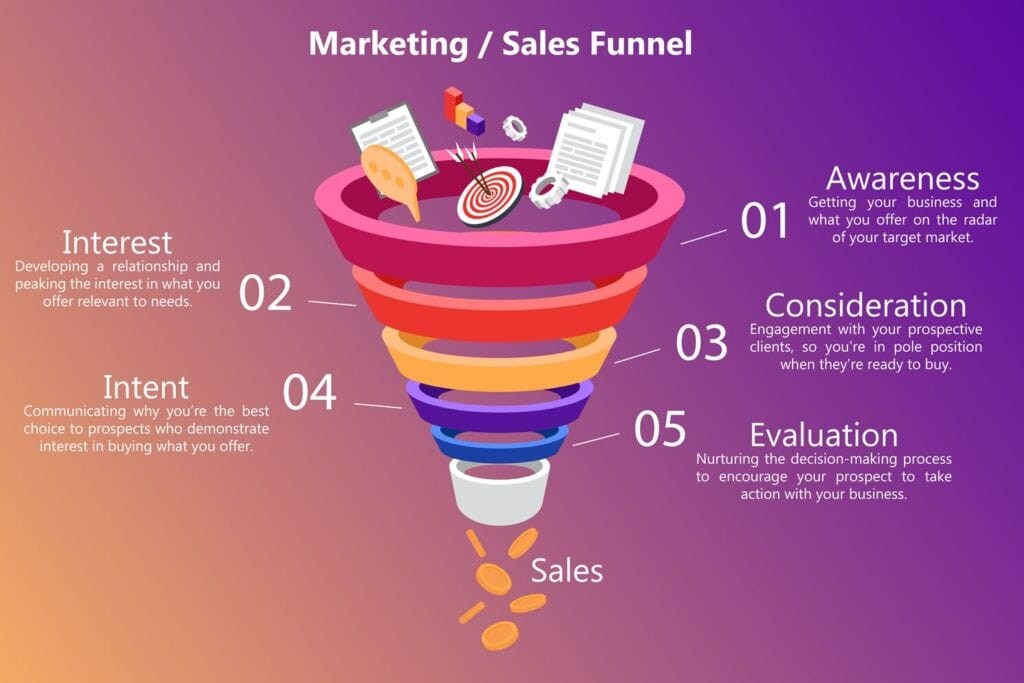
In Kartra, to developed an sales funnel, you would mapped up an visitor journey (Awareness, Interest, Decision) in the Funnel Builder, selected or developed assets (pages, products, emails) for each layer, connected them together utilizing drag-and-drop, and then added automation to nurtured leads with tailored emails and offers, applying Kartra’s pre-built campaigns and templates to faster setup.
Table of Contents
Step-by-Step Funnel Creation Kartra
Define Aim & Map the Funnel:
- Deciding if it’s to lead generation, product launch, etc..
- Go to Marketing > Funnelsand click + Funnel to develop the visual map, or using Campaigns to speed.
Create/Select Your Assets:
- Pages:Build landing pages, sales pages, checkout pages, and customizing templates. And thank you pages using Kartra’s drag-and-drop builder
- Products:Set up the digital items (courses, ebooks, etc.) with pricing and payment integrations (Stripe/PayPal).
Sequences/Emails: Design mail campaigns to nurtured onboard and leads visitor.
Build up the Funnel Flow (Linking Assets):
- Top of Funnel (Awareness):Traffic (ads/social) -> Landing Page (lead magnet opt-in).
- Middle of Funnel (Interest):From the landing page, links directed to series of value-packed mails and an sales page.
- Bottom of Funnel (Decision):Sales Page -> Checkout Page (with upsells/downsells) -> Thank You Page.
- Link buttons and formswithin the pages to a next step in a sequence (e.g., Buy button to the checkout, “No Thanks” to next page).
Automated with the Sequences:
- Utilizing Kartra’s automation to triggered email sequences and remove/add on tags based on an user actions (e.g., someone purchasing tagged them “Customer”).
- This delivered personalized content at every stage.
Test & Optimize (Simulations):
- Use Kartra’s Simulationstool to test variables (traffic, conversion rates, ad spend) to predict ROI and find the break-even point before going live.
The most efficient manner to construct the funnel in 2026 is by deploy in the pre-built campaign.
- Navigate to Campaigns:From the core dashboard, go to Campaigns > Available Campaigns.
- Select Template:Selecting the funnel based on the aim, like as “List Builder,” “Product Launch,” or “Webinar”.
- Deploy:Click Deploy. Kartra would automatically import all needed assets, including pages, email sequences, tags, and forms, into the account.
- Customize:Open every replaced placeholder images and imported asset and text with their own content applying an drag-and-drop editor.

Method 2: Build up from Scratch (Step-by-Step)
For the custom funnel, follow the steps in order. It is suggested to construct up “bottom-up,” began with the foremost pages first.
- Map Your Funnel:Using the Funnel Mapper to visually planning an journey, including sales pages, traffic sources, and opt-in pages.
- Create the Pages:Go to Pages > Add Page to construct up the following:
- Squeeze/Opt-in Page:To capturing leads.
- Sales Page:To showcasing the product.
- Checkout Page:Where consumers entered the payment details.
- Thank You Page:To confirmed the purchase and provided next steps.
- Configured a Product:Navigation to Sales > Products.
- Define the official payment terms, product name, and price (1-time or recurring).
- Connecting the payment gateway (e.g., Stripe or PayPal).
- Setting on the Thank You PageURL so Kartra understanding where to send visitor after an successful purchasing.
- Set Up Lead Capture (Forms):Go to Marketing > Forms to develop the opt-in form. Embed this form on the Squeeze Page to collection email addresses.
- Build Automation Sequences:Go to Marketing > Sequences.
- Develop the sequence triggering by “Form Submission” or “Product Purchase”.
- Designing the email follow-up flow to nurture leads or delivered a product.
- Final Linkage:Return to the Sales Page and edit the “Buy” buttons to linked them to the configured product’s checkout.
- Test the Funnel:Open the Squeeze Page in an incognito browser and completed the entire procedure as the consumer to certain all tags, emails, and redirecting work correct way.